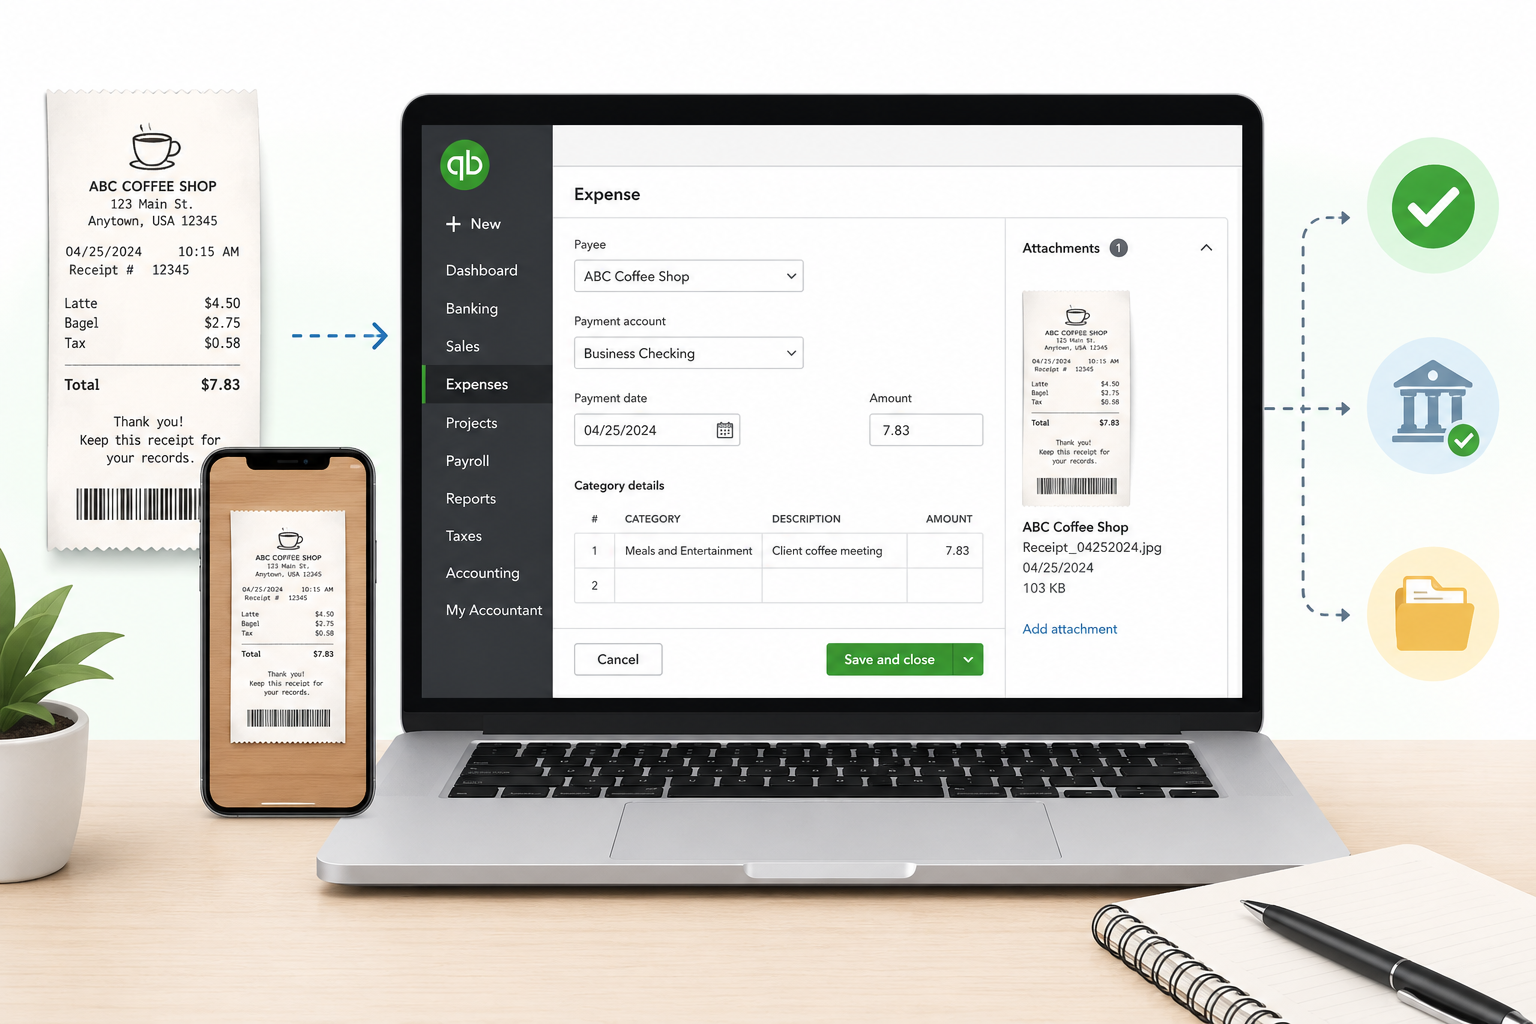
How to Attach Receipts in QuickBooks Online
9 min read
Last updated: July 2026
If you are a bookkeeper working in QuickBooks Online, attaching receipts is usually part of cleanup, reconciliation, month-end close, or audit-ready recordkeeping. The native QuickBooks workflow works well when receipt volume is low. It gets slower when you manage dozens of clients, hundreds of receipts, and transactions that may already exist in the bank feed.
The direct answer: You can attach receipts in QuickBooks Online by opening the transaction, using the Attachments section, uploading the receipt file, and saving the transaction. You can also upload receipts to the Receipts area, then add or match them to transactions after QuickBooks extracts the details. Intuit's help docs describe both workflows: direct attachments on transactions and the Receipts workflow for upload, review, add, or match.
This guide explains both native methods, when to use each, where mistakes happen, and when a bookkeeping firm should move from manual attachment to a more controlled receipt workflow.
For a related import-focused guide, see how to scan receipts into QuickBooks Online.
The two main ways to attach receipts in QuickBooks Online
QuickBooks Online gives bookkeepers two practical ways to keep receipts with transactions:
- Attach a file directly to a transaction
- Upload the receipt to the Receipts workflow, then add or match it
The right method depends on where you are in the bookkeeping process.
| Situation | Best native QuickBooks method | Why |
|---|---|---|
| The transaction already exists | Attach the receipt directly to the transaction | Best for cleanup, reconciled transactions, or one-off missing support |
| The receipt exists before the transaction is entered | Upload to Receipts, then add it | QuickBooks can extract details and help create the expense |
| The bank feed transaction already exists | Upload to Receipts, then match it | Helps avoid creating a duplicate expense |
| Client sends a batch of receipts | Receipts workflow or email forwarding | Better than opening each transaction first |
| Firm manages many clients and high volume | Automation outside native manual workflows | Reduces manual collection, extraction, matching, and review work |
Method 1: Attach a receipt directly to an existing transaction
Use this method when the transaction is already in QuickBooks Online and you only need to add the receipt as supporting documentation.
This is common during cleanup work, after bank feed categorization, or when a client sends a missing receipt after month-end review.
Steps
- Open the expense, bill, check, credit card transaction, invoice, sales receipt, or other supported transaction.
- Find the Attachments section.
- Upload or browse for the receipt file from your computer.
- Select the file.
- Save and close the transaction.
According to Intuit, QuickBooks Online supports attachments on several transaction and profile types, including bills, checks, credit card transactions, expenses, invoices, sales receipts, customers, vendors, vendor credits, and more.
When this method works well
Direct attachment is best when:
- You already know the correct transaction.
- You are fixing a small number of missing receipts.
- The receipt is not supposed to create a new expense.
- You are preparing a file for year-end review or tax support.
- You need a clean audit trail for a specific transaction.
Where this method gets slow
This method breaks down when a firm has to repeat it across many clients.
The manual steps add up:
- Find the receipt.
- Rename the file.
- Open the right QuickBooks company.
- Search for the transaction.
- Confirm the amount, date, vendor, and account.
- Upload the file.
- Save.
- Repeat.
For one receipt, that is fine. For 300 receipts across 20 clients, it becomes month-end drag.
Method 2: Upload receipts to QuickBooks, then add or match them
Use this method when the receipt is not already attached and you want QuickBooks to help extract the receipt information.
QuickBooks Online lets users upload receipts from a browser or mobile device. Intuit says QuickBooks extracts information from the receipt and creates a transaction for review, where the user can edit it, add it to an account, or match it to an existing transaction in the Receipts tab.
Steps on a web browser
- Go to All apps.
- Go to Accounting.
- Open Receipts.
- Choose Upload from computer or Upload from Google Drive.
- Upload the receipt file.
- Go to the For review tab.
- Open the uploaded receipt.
- Review the extracted details.
- Match it to an existing transaction or add it as a new one.
- Save and close.
Intuit's current help page says receipt uploads should use one receipt per file and supports PDF, JPEG, JPG, GIF, or PNG for receipt uploads.
Steps on the QuickBooks mobile app
- Open the QuickBooks mobile app.
- Open the menu.
- Select Receipt snap.
- Take a photo of the receipt.
- Use the photo.
- Review it in the For Review tab.
- Match it to an existing transaction or create the expense.
This works well for clients who already use the QuickBooks app correctly. It works less well when clients send screenshots, email chains, text messages, mixed PDFs, or receipt batches with unclear context.
Method 3: Email receipts into QuickBooks Online
QuickBooks Online also supports forwarding receipts and bills to a custom QuickBooks forwarding address. Intuit says users can create a custom forwarding email address ending in @assist.intuit.com, then email receipt or bill images there for review in QuickBooks.
This can be useful when clients already email receipts.
Best use cases
Use email forwarding when:
- A client receives vendor receipts by email.
- The client can forward one receipt at a time.
- The receipt is a supported file type.
- You still want to review and match the receipt before it affects the books.
Common problem
Emailing receipts into QuickBooks does not remove the need for review.
A receipt still needs to be checked for:
- Vendor
- Date
- Amount
- Payment account
- Category
- Class or location, if used
- Whether the related bank feed transaction already exists
If the bookkeeper skips review, duplicate expenses can appear.
Which method should bookkeepers use?
For a single QuickBooks company, native receipt attachment is often enough.
For a bookkeeping firm, the decision should be based on volume, client behavior, and month-end risk.
| Firm situation | Recommended workflow |
|---|---|
| 1–2 clients with low receipt volume | Use QuickBooks attachments manually |
| A few clients who send clean receipt files | Use QuickBooks Receipts and match carefully |
| Clients send receipts late, mixed, or incomplete | Use a client document collection workflow |
| Multiple clients use classes, locations, or detailed categories | Use review before posting |
| High receipt volume across many QuickBooks clients | Use automation with duplicate checks and QuickBooks sync |
| Cleanup or catch-up project | Upload in batches, review carefully, and avoid creating duplicate expenses |
The key question is not, "Can QuickBooks attach receipts?"
It can.
The better question is, "Can our firm attach, review, match, and post receipts consistently without slowing down close?"
Mistakes to avoid when attaching receipts in QuickBooks Online
Mistake 1: Creating a new expense when the bank transaction already exists
This is the most expensive mistake.
If the receipt belongs to a card charge already pulled into the bank feed, adding the receipt as a new expense can duplicate the transaction. The safer workflow is to match the receipt to the existing transaction when possible.
Mistake 2: Attaching the receipt but not reviewing the coding
A receipt image is support. It is not a complete bookkeeping review.
The bookkeeper still needs to confirm:
- Chart of accounts
- Vendor
- Sales tax treatment
- Class or location
- Billable status, if used
- Memo or job details
- Whether the receipt belongs to a bill, expense, or card transaction
Mistake 3: Letting clients send receipt batches with no structure
A folder full of files named IMG_4032.jpg is not a workflow.
At minimum, clients should send receipts by client, month, and entity. Multi-entity clients need extra discipline because the same vendor may appear across multiple QuickBooks companies.
For more on this, see client document collection and document collection for bookkeeping.
Mistake 4: Treating attachments as a replacement for reconciliation
Attaching receipts does not prove the bank account is reconciled.
A receipt can support a transaction, but reconciliation still confirms the transaction cleared the bank or credit card account.
Mistake 5: Skipping duplicate review
Duplicate review matters when receipts are uploaded after bank feed activity.
A good workflow should check whether the transaction already exists before anything is posted or synced.
Where native QuickBooks receipt attachment is enough
Native QuickBooks attachment is a good fit when:
- Receipt volume is low.
- The client is organized.
- The transaction already exists.
- The bookkeeper only needs supporting documentation.
- There is no need for line-item extraction.
- There are few classes, locations, or job costing rules.
- One person owns the review process.
In that situation, do not overcomplicate it. Open the transaction, attach the receipt, and move on.
Where automation helps
Automation helps when attaching receipts becomes a production workflow.
For bookkeeping firms, the hard parts are usually not the upload button. The hard parts are:
- Getting clients to send documents on time.
- Separating receipts by client and period.
- Extracting vendor, date, total, tax, and line items.
- Reviewing low-confidence fields.
- Preventing duplicates before posting.
- Syncing clean data into QuickBooks.
- Keeping month-end close from turning into receipt chasing.
That is where ScribeosAI fits.
ScribeosAI is QuickBooks-first receipt and invoice automation for bookkeepers and small CPA firms. The workflow is:
client document collection → AI extraction with line items and confidence scoring → human review → duplicate detection → QuickBooks sync
Instead of manually attaching every receipt after the fact, a firm can move receipts through a controlled review queue before they become QuickBooks work.
That matters for firms managing 5–100 clients because the bottleneck is not one receipt. It is the repeated handling of client documents across every close cycle.
For more on the QuickBooks workflow, see QuickBooks receipt scanner and receipt scanner for bookkeepers.
What human review still needs to handle
Automation should not remove the bookkeeper from the workflow.
Human review still matters for:
- Unclear vendors
- Split categories
- Class and location rules
- Meals, travel, and mixed-purpose purchases
- Reimbursable expenses
- Job or customer assignment
- Receipts that do not match bank activity
- Possible duplicates
- Client-specific coding rules
This is why review-before-post matters.
ScribeosAI is designed around a human review step before QuickBooks sync, with duplicate detection at the push gate. That is a better fit for bookkeeping firms than a workflow that blindly posts extracted data.
Why line-item extraction matters
Basic receipt attachment only stores the image.
For many bookkeeping clients, that is enough. But some firms need more detail.
Line-item extraction matters when you need to see what was purchased, not just the receipt total. That can help with:
- Mixed purchases
- Vendor analysis
- Job costing
- Class detail
- Multi-category expenses
- Cleanup questions
- Client review
ScribeosAI includes line-item extraction as part of the workflow.
For firms that only need receipt images attached to transactions, native QuickBooks may be enough. For firms that need receipt detail reviewed and synced into QuickBooks, automation is a better fit.
Proof
VNB Consulting reduced manual data entry time by nearly 90% using ScribeosAI.
Diya Hospitality is also a named ScribeosAI customer.
The point is not that every firm needs automation on day one. The point is that firms handling recurring receipt volume need a workflow that protects review quality while reducing manual entry.
Start free — 50 pages, no card required →
Quick workflow recommendation
Use this decision path:
- Only need to add support to an existing transaction? Use QuickBooks transaction attachments.
- Have a receipt and need QuickBooks to help create or match the transaction? Use the Receipts workflow.
- Have clients sending receipts every month across multiple QuickBooks files? Use a document collection and automation workflow.
- Need line items, confidence scoring, human review, duplicate detection, and QuickBooks sync? Use ScribeosAI.
Conclusion
QuickBooks Online can attach receipts in more than one way. For low-volume work, open the transaction, use Attachments, upload the receipt, and save. For receipt-first workflows, upload receipts to the Receipts area, review the extracted details, then add or match them.
For bookkeeping firms, the bigger decision is operational. If your team is spending close time chasing receipts, downloading files, matching transactions, and checking for duplicates, manual attachment is not the workflow. It is the bottleneck.
Use native QuickBooks when the volume is manageable. Use ScribeosAI when receipt handling needs to become a reviewed, repeatable, QuickBooks-first workflow.
FAQ
How do I attach receipts in QuickBooks Online?
Open the transaction, go to the Attachments section, upload the receipt file, and save the transaction. You can also upload receipts through the Receipts workflow and match them to existing transactions.
Can I attach a receipt to an existing transaction in QuickBooks Online?
Yes. Open the existing transaction, use Attachments, upload the receipt, and save. This is useful when the transaction already exists and you only need supporting documentation.
Can QuickBooks Online match receipts to bank transactions?
QuickBooks Online can suggest matches for uploaded receipts. You should still review the match before saving to avoid duplicate or incorrectly coded transactions.
What file types can I upload as receipt attachments in QuickBooks Online?
Intuit's attachment help page lists supported attachment file types including PDF, JPEG, PNG, DOC, XLSX, CSV, TIFF, GIF, and XML. Receipt upload guidance lists PDF, JPEG, JPG, GIF, and PNG for uploaded receipts.
Is attaching a receipt the same as entering an expense?
No. Attaching a receipt stores supporting documentation. Entering or adding an expense creates the accounting transaction. If the transaction already exists, match or attach the receipt instead of creating a duplicate expense.
Can clients email receipts into QuickBooks Online?
Yes. QuickBooks Online supports a custom forwarding email address ending in @assist.intuit.com for receipts and bills, then the documents are reviewed in the Receipts area.
When should a bookkeeping firm stop attaching receipts manually?
Manual attachment becomes inefficient when the firm manages many clients, receives high monthly receipt volume, needs line-item detail, or spends too much close time matching, reviewing, and checking for duplicates.
Does ScribeosAI replace QuickBooks Online?
No. ScribeosAI is QuickBooks-first receipt and invoice automation. It helps collect client documents, extract data, review fields, detect duplicates, and sync clean data into QuickBooks.